Networking and 1:1 Chat Feature
To join the chat, you will want to click Launch Chat in the top left of the navigation bar. If you are having an issue, you can also launch the chat in a stand-alone tab by clicking here: Launch Chat
Logging in

Figure 1: Networking and Chat Navigation Button
The Networking and One-to-One chat feature will be available as a navigation element from your OpenWater program’s website.
Clicking on “Network and Chat” will open the chat feature in a new browser tab.
In the new tab, you may be presented with a screen similar to Figure 2 on the right in order to login.
Once you’re successfully logged in, you’ll be able to access the Networking & Chat features.

Figure 2: Sample Login Form
Getting ready to chat
When you use the Chat system for the first time, it will ask you to set up your profile. Figure 3 shows the profile form.

Figure 3: Profile Form
Add your first and last names, and other identifying details. Make sure to choose whether you’d like to be shown in the Attendee Directory so other attendees can find you easily. You can easily upload a Profile photo, to make you easier for other attendees to recognize.
Click the “Save” button (circled in red above) to make sure you save your changes and to allow you to continue.
Once you have saved your profile details, you are ready to use the chat features!
Anatomy of the chat
Once you are in the main chat window, you’ll enter first into the default chat room for your conference.
On the left will be a list of all available chat rooms, followed by a box of helpful navigation tools for accessing the Attendee Directory; Chat Requests (people who would like to have a private chat with you); the Group Chat Topics (a searchable directory of all chat rooms); and a Log Out function.

Figure 4: The Main Chat Screen
In the middle, will be the current chat and a scrollable chat history and on the right will be details about the chat room, plus tools for more specialized chat tools.
To chat, you’ll use the Chat bar across the bottom of the chat window:

Figure 5: The chat bar
You can type your message and hit “Enter” to send, or use the emoji button  to open the emojis panel.

Figure 6: The Emojis Panel
If you want to add files or images to share with other attendees, you can click on the “Attach files” button  . This will open your device’s file upload dialog and allow you to locate a file or image to share.
In every chat, you will have the ability to invite all members or individual members to have a video call for further discussion.
This feature is available from the right side of the main window, underneath the icon and name of the chat room or attendee with whom you are speaking.
To begin a call, click the “Start Call” icon as shown in Figure 7.
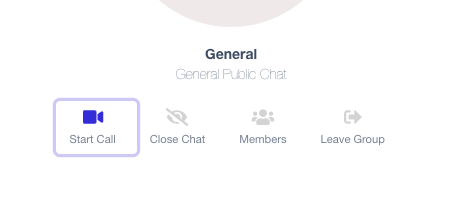
Figure 7: The Start Call Feature
If you click the “Close Chat” icon, the chat will remain closed and unavailable to you unless and until someone else says something in that chat channel. At that time it will reappear as a channel option in the left-hand side of the main window. To leave the chat permanently, you can use the “Leave Group” option.
The “Members” icon will provide a shortcut of all attendees and exhibitors currently members of this channel. This window provides the username, their user profile picture and is searchable!
More features for finding users and managing your One-to-One chats are covered in the next section.
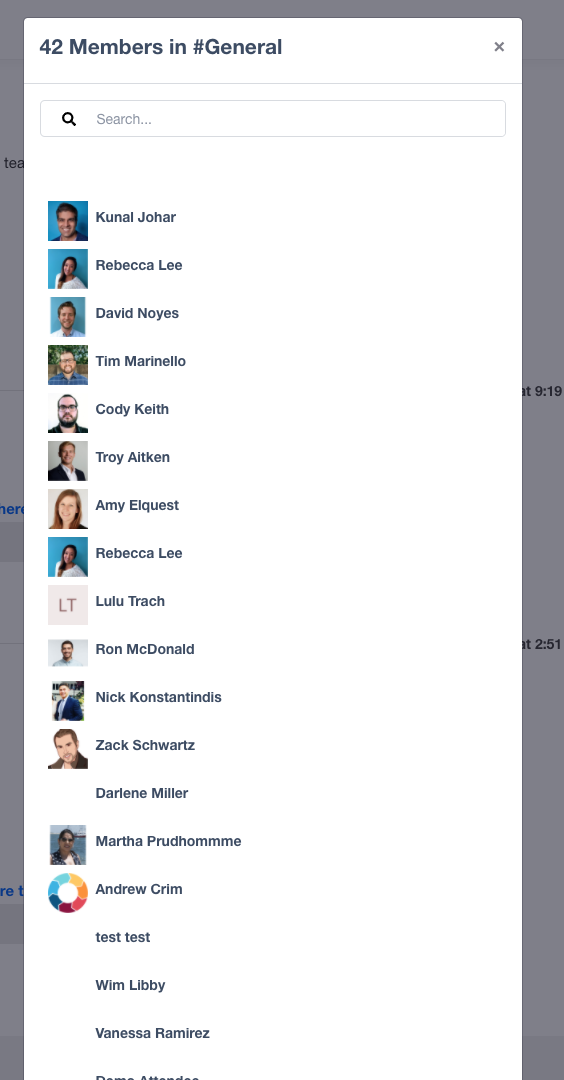
Figure 8: The Chat Attendee Screen
More features for managing your experience

Figure 9: Other features
On the bottom left of the main window are some useful features for managing your Networking and 1:1 Chat experience.
Attendee Directory provides a browsable and searchable method of locating attendees, presenters, and sponsors.
Pending Chat Requests provides a way to accept or decline chat requests from people interested in talking with you. You may also see your history of chats, and people you have chosen not to chat with.
Group Chat Topics provides a way to locate chatrooms you have joined; search for topics or exhibitors you’re interested in; and methods for leaving chats or acquiring chatroom links to share with other attendees.
Getting Help

The Networking and 1:1 Chat Feature provides a direct link to searchable Help from the “How to Use It” link available from the main chat window.
